Usage
Configuration
Once you've added the connector, you will be able to go to one of your flow files and add the configuration connector.
Go to a flow file, select Global Elements and click on create
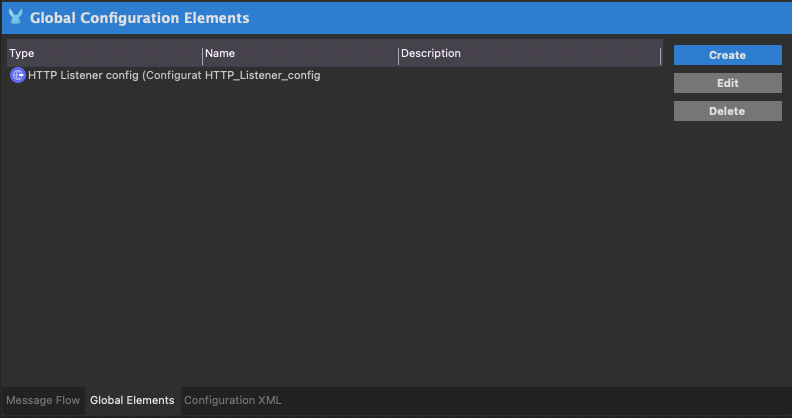
Then under Connector Configuration you will select Enhanced Mule Properties Config
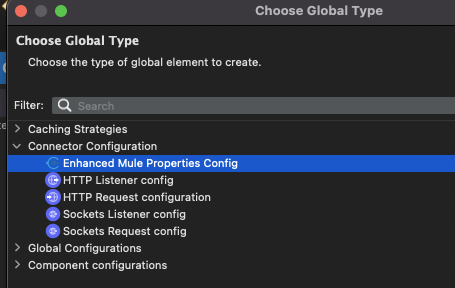
This will give you the configuration parameters UI.

Typically, you will leave all configurations in that UI as-is and instead override parameters via System Properties (so
for example using -D JVM parameters in studio, or through Anypoint Runtime Manager properties )
If you need to modify those parameters please note the special syntax used in those field.
Instead of using ${someproperty} annotation to retrieve system properties, it uses sys::someproperty.
This syntax allows the same without the risk of breaking metadata in studio (studio metadata process runs without any properties,
so any use of ${} syntax in a property placeholder will immediately break studio metadata), and also allows to specify default values
by using the syntax sys::someproperty:mydefaultvalue (so if someproperty isn't defined, it will use mydefaultvalue as a value)
Here's what each property does:
Core Properties
| Property Name | Description |
|---|---|
| Descriptor Path | This is the path to the properties descriptor file |
| Environment Name | Environment name. This variable should only be set when deploying to a remote runtime, and if using Enhanced Mule Tools will be automatically set |
| Environment Type | Environment type (must be either local, sandbox or production. This variable should only be set when deploying to a remote runtime, and if using Enhanced Mule Tools will be automatically set |
| Crypto Key | This is used to specify a decryption key. This should also only be used for deployed applications. See encrypted properties for details |
| Log resolved properties | If set to true, the resolved properties will be logged at startup, excluding sensitive properties |
Azure Vault
The following properties are used to integrate Azure Vault
| Property Name | Description |
|---|---|
| Azure Vault Enabled | If set to true, azure vault integration will be started (in which case all the other properties in this group must be set |
| Cache Time To Live | dynamic retrieval of properties are cached for the specified duration (in ISO 8601 duration format). set to 0 or no to disable caching |
| Tenant Id | Azure tenant id |
| Vault URL | Azure vault url |
| Azure Vault Client Id | Azure client id |
| Azure Vault Client Secret | Azure client secret |
Accessing properties from application
In order to use this property manager, you need to create both a definition file which defines what properties exist, and configuration files for target environments or local.
Properties can be accessed through the standard mule property placeholder syntax ${},
as well as using the dataweave function p().
Using the dataweave function supports dynamic properties when used in combination with property expressions.
For example, if you use the expression {{azvault:secret:mysecret}}, it will retrieve it once only and always use the same
value when using a property placeholder. However, if the property is retrieved via the p() function, it will retrieve
the secret from azure vault every time the function is called (assuming caching is disabling, otherwise it will re-retrieve
new values once the cache has expired).
Definition File
To define properties, you should create a property definition file. This file can be any YAML or JSON file located in the
application resources (src/main/resources). The path is specified in the configuration (see Setup) and defaults
to properties.yaml (so in your project that would be src/main/resources/properties.yaml)
This file should list each property your application supports and provide information about it.
ie:
http.listener.port:
  name: HTTP Listener port
  description: Specified which port this application will listen to
accounts.apikey:
  name: Accounts API Key
  description: API Key to access the accounts API
You can additionally assign a default value (never use this to set environment-specific properties like credentials for example)
http.listener.port:
  name: HTTP Listener port
  description: Specified which port this application will listen to
  default: 8080
accounts.apikey:
  name: Accounts API Key
  description: API Key to access the accounts API
This syntax is used to specify simple text properties, however you can also specify a "type" to allow powerful special variables like for example to inject SSL keystores via properties. See Property Types for more details.
ie:
http.keystore:
  name: HTTP keystore
  description: Keystore containing SSL private key and certificate
  type: file
Additionally, you can also set a secure flag in a variable. If set to true those properties values will not be logged
when Log resolved properties is enabled (which is by default), and the properties will be encrypted should use that
feature (see Encrypted Properties).
ie:
Properties assigment files
In order to assign properties in your project, you should create one or multiple files with the same base path as your descriptor file.
The base path is the descriptor file without the extension (so if you use the default properties.yaml your base path is properties)
Those files can be either .properties, .json or .yaml files. For example:
example: application-local.yaml:
example: application-local.json:
Local Properties
To specify local properties, create a file with the base path appended with -local and the corresponding extension.
So for example application-local.properties
This file will contain values that will be used when running locally in studio.
Environment Name files
Those files are used to specify properties which are specific to an environment, and use the base path appended with
-env-[envname].[ext]
ie: application-env-dev.properties
Environment Type files
Those files are used to specify properties based on environment type, and are only used if a matching Environment Name
file isn't found.
For this will you need to use the base path appended with -envtype-[envname].[ext]
ie: application-envtype-sandbox.properties